
Key Takeaways
- Best Mount: A magic arm with a clamp provides the most versatile and stable attachment for any feeder type.
- Ideal Distance: Position your GoPro 12-18 inches from the feeding area—close enough for detail, far enough to avoid scaring birds.
- Optimal Settings: Record in 1080p at 60 fps for the best balance of video quality, battery life, and storage efficiency.
- Power Management: Standard GoPro batteries last only 1-2 hours. Use an external 10,000 mAh power bank for all-day recording.
- Camera Placement: Mount the camera slightly above perch level and angle it toward the most active feeding spots, not directly at the feeder itself.
You know the regulars. The chickadee that darts in, grabs a seed, and vanishes. The bossy blue jay that clears the feeder with a single screech. But what happens the moment you walk back inside? Which birds are visiting while you’re at work? What does the feeder look like during that golden hour just before sunset when the light is perfect?
Attaching a GoPro to a feeder isn’t just about getting video—it’s like installing a wildlife documentary studio in your own backyard. You’ll capture territorial disputes you never knew happened. You’ll see fledglings learning to land for the first time. You might even catch that rare visitor who only shows up when no one’s watching.
This guide walks you through exactly how to attach a GoPro: which GoPro models work best, what mounting accessories you actually need, how to position the camera for optimal footage, and the settings that will make your videos look professional. No guesswork required.
Choosing the Right GoPro and Accessories
Modern GoPro cameras offer 4K resolution and wireless connectivity that make them excellent bird feeder cameras, while specific mounting accessories determine your success in capturing close-up wildlife footage.
Selecting the Best GoPro Model to Attach to Feeders
Any GoPro model from the Hero 7 and onward can work as a bird feeder camera, but newer models offer significant advantages for wildlife filming. The GoPro Hero 13 Black delivers the best low-light performance to date, which matters on overcast days when birds are most active. Its improved battery management also extends recording time compared to earlier models.
If you’re on a budget, the GoPro Hero 11 Black remains an excellent choice. It offers 4K resolution and the same sensor size as the Hero 12, just with slightly older processing. You’ll still get sharp, detailed footage for a lower investment.
Battery life matters significantly for bird photography. Standard GoPro batteries last 1-2 hours of continuous recording, which isn’t sufficient for capturing unpredictable bird behavior. You’ll need external power options for extended sessions.
Your action camera should support large microSD cards of at least 128GB. A 128GB card stores approximately 3 hours of 4K footage or several thousand burst mode photos. The wireless app connectivity available on recent models lets you trigger recordings remotely, avoiding the need to approach the feeder and disturb birds.
Essential Accessories for Mounting and Protection
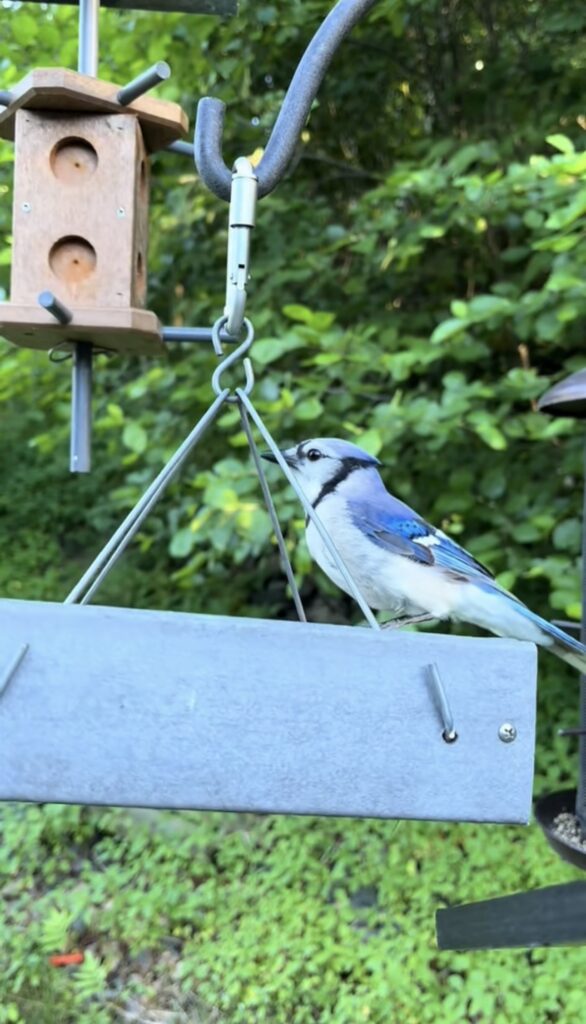
A magic arm mount provides the most versatile positioning option for your bird feeder cam. The SmallRig Magic Arm and Clamp is the industry standard—it extends 11 inches, features multiple pivot points, and locks down solidly enough to withstand wind and bird landings. The clamp-style base attaches to branches, posts, or the feeder pole itself, while the adjustable arm positions your camera 12-18 inches from the feeding area.
For ground-feeding setups, a compact tripod like the Joby GorillaPod offers quick repositioning. Its flexible legs can wrap around branches or stakes, giving you options the magic arm can’t. You’ll also want a weatherproof housing to protect your camera during rain. While GoPro’s are waterproof, the housing adds an extra layer of protection against dust, debris, and curious squirrels.
Power banks solve the battery limitation problem. An Anker 10,000 mAh Power Bank connected via USB keeps your GoPro recording long enough to fill a 128GB card. Position the power bank away from the feeder to avoid alarming birds—I wrap mine in camo tape and tuck it behind a branch.
A spare microSD card prevents missing footage while transferring files. Cards rated U3 or V30 handle 4K video recording without dropped frames.
Mounting Methods and Camera Positioning
The right mounting method determines whether you’ll capture clear footage or miss critical moments of bird activity. Your choice depends on your feeder type, available equipment, and the specific bird behaviors you want to document.
What’s the Best GoPro Mount for a Bird Feeder?
A magic arm mount offers the most versatility for GoPro bird feeder setups. The adjustable arm typically extends 11 inches and features multiple pivot points, allowing you to position your camera at virtually any angle around your feeding station. You can attach the magic arm directly to your feeder pole, the edge of a bird table, or even the feeder itself if it’s sturdy enough.
Tripod mounts work best when you want to film ground-feeding birds or need to position your camera away from the feeder structure. While you can’t attach a tripod directly to most feeders, this setup gives you stability and easy height adjustment. Some bird buddy systems and commercial feeding stations include tripod-compatible mounting rings.
Pole mounts clamp directly onto feeder poles and provide a stable platform close to the action. These mounts typically use a screw mechanism to secure the camera and prevent rotation. For hanging feeders, you can mount the camera to the same pole or hook, keeping everything on one support structure.
How Do I Keep My GoPro Secure in Wind and Weather?
Your GoPro must stay firmly in place despite wind, bird landings, and weather conditions. Double-check that all thumb screws are tightened completely before leaving your camera unattended. The mounting buckle should click audibly when properly seated.
Test your setup by gently shaking the feeder or pole. Any camera movement indicates you need to tighten connections or choose a more rigid mounting point. For adhesive mounts, clean the surface thoroughly and allow 24 hours for the adhesive to cure before attaching your camera.
Position your camera at least 12 inches from the feeding perches to maintain focus. The GoPro’s wide-angle lens captures a broad field of view, so you don’t need to be extremely close. Wind can cause significant vibration in lighter feeders, so choose the sturdiest attachment point available on your feeding station.
Where Should I Position My GoPro to Film Birds?
Point your camera at the most active feeding perches rather than centering it on the feeder itself. Birds typically approach feeders from specific directions based on nearby cover and your yard layout. Watch your feeder for a few days before mounting your camera to identify these patterns.
Side angles capture birds in profile, showing wing movements and feeding techniques clearly. Front-facing positions work well for recording territorial displays and social interactions between birds. Avoid positioning your camera where it will catch direct sunlight for extended periods, as this creates harsh shadows and potential lens flare.
Mount your camera so it sits slightly above or level with the main feeding perches. This angle provides the most natural perspective of bird behavior and prevents you from filming mostly tail feathers or the tops of heads.
Camera Settings and Recording Techniques
Proper GoPro settings ensure you capture sharp, well-exposed bird footage while managing battery life and storage efficiently. The right combination of video modes, resolution settings, and remote access features makes the difference between missed opportunities and stunning bird behavior documentation.
Should I Use Video or Photo Mode for Bird Watching?
Video mode works best for continuous bird feeder monitoring since it captures all activity without intervention. You can record extended feeding sessions and review footage later to identify interesting behaviors. Set your GoPro to looping mode if storage space is limited, which automatically overwrites older footage.
Burst mode offers advantages when you want to capture rapid wing movements or multiple birds arriving simultaneously. This mode takes several photos in quick succession, giving you the best chance of getting sharp images of fast-moving subjects. Time lapse photo mode provides another option for documenting feeder activity throughout the day while conserving battery and storage.
Standard photo mode requires manual triggering, which limits its usefulness for unattended bird feeder setups. You’ll miss spontaneous moments unless you’re actively monitoring the feed.
What GoPro Settings Work Best for Bird Videos?
1080p at 60 fps provides the sweet spot for bird feeder cameras, delivering clear footage while conserving battery life and storage space. This resolution captures sufficient detail to identify species and behaviors from typical feeder distances of 12-24 inches.
4K video offers maximum detail but drains your battery significantly faster and fills your SD card quickly. Reserve this setting for special documentation projects rather than all-day recording sessions.
Set your exposure to auto for changing light conditions throughout the day. Birds feed during varying lighting, from dawn to dusk, and manual exposure settings often result in overexposed or underexposed footage. Enable Protune if you want more control over color profiles and sharpness, though default settings work well for most bird watching purposes.
Frame rates above 60 fps help when you want slow-motion playback of wing movements or landing sequences.
Power Solutions, Maintenance, and Post-Processing
GoPro cameras require regular power management and proper protection to function reliably as bird feeder cameras. Managing battery life, weatherproofing your setup, and handling footage efficiently will determine the success of your birdwatching project.
How Can I Record All Day Without Killing My Battery?
GoPro cameras are battery-powered, which limits continuous recording time to a few hours per charge. You’ll need to remove the camera regularly to recharge unless you implement an external power solution.
An external battery pack can extend recording sessions significantly. USB power banks designed for outdoor use connect directly to your GoPro’s USB-C port and can provide multiple days of power. Some users run a weatherproof extension cable from an indoor outlet to power the camera continuously, though this requires careful wire management and waterproof connections.
Will Rain or Squirrels Damage My GoPro Setup?
GoPro cameras are waterproof but still vulnerable to condensation, extreme temperatures, and curious wildlife. Anti-fog inserts absorb moisture inside the camera housing and prevent lens fogging during wet conditions or temperature changes.
Mount your feeder cam securely to prevent it from being knocked loose by larger birds or squirrels. Magic arm mounts provide stable attachment points but should be checked weekly for looseness. Consider placing a physical barrier or cage around the camera if squirrels frequently visit your feeder.
Clean the camera lens weekly with a microfiber cloth to remove water spots, pollen, and bird droppings. Check all mounting hardware monthly and tighten any loose connections before they fail.
Frequently Asked Questions
Mounting a GoPro on a bird feeder requires careful consideration of both equipment security and bird comfort. The following questions address common concerns about attachment methods, camera settings, and optimal positioning for wildlife footage.
What is the safest way to attach a GoPro on a feeder without disturbing the birds?
Set up your GoPro mount at least 24 hours before you start recording to give birds time to adjust to the new equipment. Use a magic arm mount clamped to an existing feeder pole or nearby branch rather than modifying the feeder itself. This approach keeps the feeding area unchanged while positioning the camera nearby.
Choose mounts in neutral colors like black or dark green that blend with natural surroundings. Avoid placing the camera directly above or on top of the feeding platform where it might intimidate birds.
Position the GoPro 12 to 18 inches away from the main feeding zone. This distance provides clear footage while maintaining enough space that birds won’t perceive the camera as a threat.
Which GoPro mount is recommended for capturing high-quality bird video at a feeder?
A magic arm mount with a clamp provides the most versatility for bird feeder setups. The articulating arm allows you to adjust the camera angle precisely and attach to various surfaces including feeder poles, tree branches, or stakes.
For ground-feeding birds, a mini tripod offers quick setup and easy repositioning. You can place it several feet from the feeding area and adjust the height as needed.
The clamp portion of a magic arm mount accommodates different diameter poles and branches. This flexibility lets you position the camera at the exact angle needed to capture bird activity.
How can I ensure my GoPro stays secure on a bird feeder in various weather conditions?
Tighten all mount connections firmly before leaving the camera unattended. Check the magic arm’s ball joints and the clamp mechanism to ensure they won’t shift during wind or when birds land nearby.
Use a power bank secured with velcro straps or zip ties near the camera to prevent the weight of cables from pulling on the GoPro. Keep the USB cable connection protected from moisture with electrical tape or a waterproof housing.
Position the mount on a stable part of your feeder pole or structure that doesn’t sway in wind. Avoid placing the camera on thin branches or lightweight feeder components that might move.
Are there any special accessories needed to attach a GoPro to a bird feeder for extended periods?
A 10,000 mAh power bank plugged into the charge port enables extended recording sessions beyond standard battery life. This capacity provides enough power to fill a 128 GB SD card with footage.
You need a 128 GB or larger microSD card to accommodate several hours of 4K recording. Smaller cards will require you to interrupt filming to swap out storage.
A weatherproof case or housing protects your GoPro from rain and morning dew during outdoor setups. Standard GoPro models are water-resistant but benefit from additional protection during multi-day recordings.
What are the best practices for positioning a GoPro to capture bird behavior at a feeder?
Place your camera so the lens faces away from direct sunlight throughout your recording period. Sun shining directly into the lens creates exposure problems that make footage unusable.
Set up when weather forecasts predict clear conditions. GoPro cameras produce better image quality in strong natural light compared to overcast or dim conditions.
Use the GoPro app to monitor a real-time preview from inside your home up to 40 feet away. This wireless connection lets you verify framing and trigger recording when birds arrive without disturbing them.
Lock the exposure on the foreground feeding area rather than letting the camera auto-expose for bright sky. This prevents birds from appearing too dark in your footage.
Looking for the right optics to go with your new feeder camera setup? Check out our guide to the Best Binoculars in 2026 to find the perfect pair for you!
Pingback: Homemade Suet Recipe for Woodpeckers Without Peanuts: Safe Energy-Rich Bird Feeding Guide -